Normally we deploy the projects on Azure using Visual Studio IDE, but Azure is not just limited to all Microsoft technologies specially when the majority of developers are on open source or moving to open source.
In this post I am going to provide you a very step by step process to deploy your Nodejs project having a source control on Github to Microsoft Azure cloud.
The basic things which you need to setup before you can start your deployment are as follows:
- Nodejs : You can download Nojejs from here https://nodejs.org/en/
- Github repository account: First you need to setup a new account (if you don’t already have) in https://github.com/
- Github for Desktop: I am using Github for windows to Commit and Push my changes to Github repository, but you can use other tools as well to push your files to Github. You can download from here: https://desktop.github.com/.
- Microsoft Azure: If you don’t have Azure subscription you can signup for 1 month free trial. This will give you $200 credit to spend on all the Azure Services: You can visit this link to Signup for a month free service: https://azure.microsoft.com/en-us/pricing/free-trial/
You don’t need to have very advanced knowledge of Node, Github or Microsoft Azure to follow the steps I have covered here but I am assuming that you have at least basic knowledge of Nodejs, Github and Azure. Now Once you have all the required setup installed on your machine, lets get started with the basic steps which is required to deploy your Nodejs sample application on Azure using Github.
Step 1 Setup your environment: Create a working folder which you want to use for your application, and start Git Bash on your working directory. Alternately you can use windows command prompt. For this example I have created a folder in my local C drive as C:/Source/NodeOnAzureSample
If you already have your application which you want to deploy on Azure you can use that. For this example I am using express-generator to quickly create a sample application using Node, Express and Jade, I am using this just to save time and keep our focus on the actual topic.
Step 2 (Optional) Setup my demo project: This is a optional step if you already have your application ready. Here I am using the command “npm install express-generator -g” to generate my sample application template with a basic welcome page. You can find more detail of express-generator @ http://expressjs.com/starter/generator.html
This will create the sample files inside node modules globally in your C:/Users/YourUserName/AppData/Roaming/npm/express folder, or you can create the files in your local application folder by removing the –g from the command.
Now run “express NodeOnAzureSample” command, this is going to create all the required folders and files which you are going to start your development.

Step 3 (Optional) Restore the dependencies: Run “npm install”, this will restore all the dependencies like jade, express, etc which your application has dependencies.
Step 4 Test the application on localhost: After executing Step 1 to 3, we have our application ready to run on local machine, lets go ahead and test our sample application by switching to the application directory and run the command “npm start” in Git Bash (you can use powershell or windows command prompt) and enter “localhost:3000” in your browser. This should give you the following screen and your sample application is ready for hosting. Now in Next Steps I am going to configure my application with Github repository.

For simplicity sake and stick to the topic, I am not going to explain the folder structure, code, and other granular details of this sample application.
Step 5: Setup Github Repository @ Guthub.com Go to https://github.com/new and create a new repository, once you select all your desired options as shown in the image below. Click on the button “Create Repository”

You will be provided step by step information on the new repository which you have created,
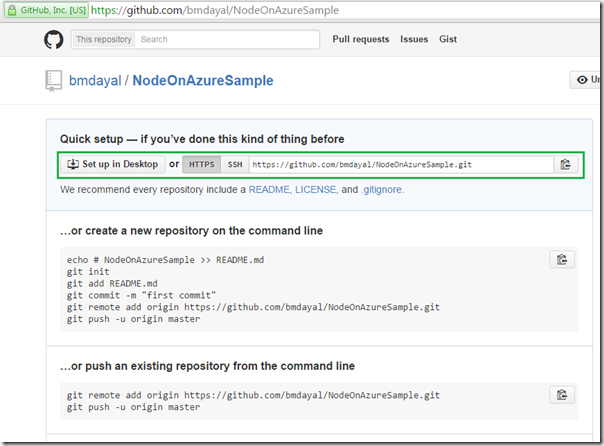
Copy the URL, in your clipboard or notepad, you are going to need this URL during commit and push of your local application files to github repository at github.com online.
For this example my repository URL is : https://github.com/bmdayal/NodeOnAzureSample.git
Step 6: Setup Github Repository on you Desktop: Open Git Gui and Select Create new Repository from the menu which will ask you to locate your application directory, select the folder which you want to deploy to Azure. In my case I have mapped my “NodeOnAzureSample” application to Git repository.
Once you select create, Git GUI will list all the files which are either new or modified. Next step is you need to Stage Changed files, Commit and Sign Off, to perform these first you need to setup a new repository in https://github.com which I have already explained in Step 5 above.

Select “Stage changed” –> Sign Off –> Provide initial commit message –>Commit—>and Push.
Selecting Push is going to final commit your files to online github repository, to do this you will need the URL of your GitHub repository at github.com, and this will also prompt you to authenticate yourself.

Once your files successfully pushed to online repository, you will get a confirmation message as below.

Now that your files are ready for deployment, lets switch to Azure to configure continuous deployment.
Step 7 Configure Azure website: to do this you need to go to https://manage.windowsazure.com dashboard. Select Web Apps—>And select New from the footer menu.

This is going to provide you a wizard to create a new WEB APPS. For this example I am going to use Quick Create option to create my web application and named this as NodeOnAzureSample. If the name is available you will get a green check mark next to the name. This will provide you with a URL as https://nodeonazuresample.azurewebsites.net. Once you are happy with the name click on “Create Web App” button.

You can see the site is now listed in the WEB APP list and showing as Running, now click on the URL to test your web site @ http://nodeonazuresample.azurewebsites.net/.
This is going to provide you a welcome page of Azure Web site. In my nest steps I am going to replace the welcome page with actual application which we have created and pushed in Github.

Step 8 Configure deployment using Github: Select the Web App listed in the image above and Select Dashboard from the top menu.

From the dashboard, select Set up deployment from source control from right navigation menu.

You will be provided with a list of options, where you need to select GitHub, and select Next
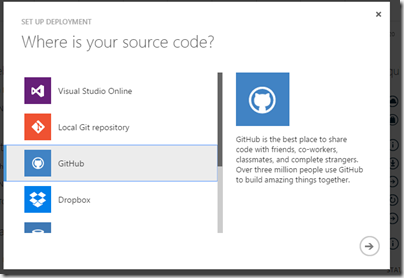
You will need to authenticate yourself to GitHub where you have created your repository that needs to be deployed on Azure.

On successful authorization, you will be provided with the list of your applications which you have deployed on Github, for this example I have selected my “NodeOnAzureSample” application.

Select Done when you have made your selection, and this is pretty much what we need to do to link my Github repository to Azure website.
Deployment Stage 1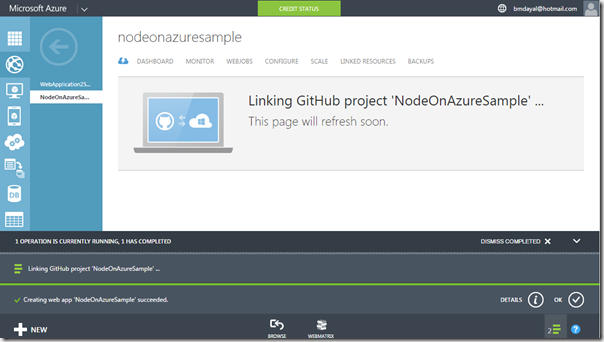
Deployment Stage 2: Notice you got a new menu called “Deployments” after Dashboard. Be patience, this might take few seconds to minutes depending upon the size of your application.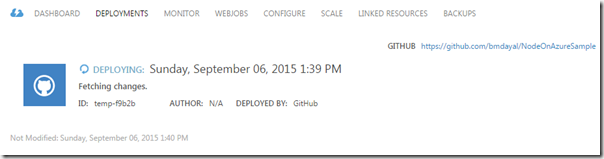
Deployment Stage 3: Deployment completed, you can see the initial comments which I had provided during my Commit to Github
Step 9 Testing your deployment on Azure website: Now that your application is deployed on Azure the next step is to test my application, yes no further configuration is required. Azure configures everything for you. Lets go to the WEB APP Dashboard and hit on the URL : nodeonazuresample.azurewebsites.net

Yes our application is ready and running on Azure 
Step 10 Continuous deployment: To verify Continuous deployment. Go to your index.js, in NodeOnAzureSample/routes folder and change the text from “Express” to “Node, Express, Azure and Github”

Save the file, go to your Github Desktop—> Rescan—>Commit and Push the file with comment “Changed the welcome text from Express to Node, Express, Azure and Github”

Once you complete these steps, go back to your Azure dashboard. And probably by the time you switch back to your Azure your changes might have already been deployed to your website. Lets go ahead and verify.

And here we go, on my azure dashboard above I can see the latest changes are already deployed with the comment I have provided in my github commit.
Lets test this change in my browser by refreshing the page, and yes my changes are reflected below.

This is just a simple example of how the things are simplified in Microsoft Azure. This post will give a head start to integrate Node, Express, Github and Azure.
You can use any of your favorite open source like Angular, Knockout, Backbone, Jade, etc with your favorite source control like Visual Studio, GitHuib, Dropbox, Codeplex, etc and integrate with Microsoft Azure and above all you don’t need to be a Ninja on this technologies.
Happy Coding and Keep exploring


